Showing posts with label Domain Name. Show all posts

Tuesday

What is a Domain Name ? How to register a Domain name for you ? Beginner Guide

How to get a Domain name for your website?


How to create your own website in Wordpress ? CLICK HERE  


04 steps: Important steps when you are going to register a Website

As you set up your new business, one of the first things to do is to select and purchase your website address, commonly known as a domain name. In this article, we will provide you with a list of things to consider and avoid when choosing a perfect domain name for your business.

The majority of people believe that it is quite complicated. The answer is a hearty NO. There’s nothing complicated. It is a simple process.

Every website needs an address to access it, known as a URL, for everyone including the owner. Your domain is the address used to identify your website. But every domain name/website belongs to an IP address, which is represented by a seemingly random string of numbers.

When you enter a domain name in your browser, your browser sends a request to a group of servers that make up the DNS (Domain name system). This DNS lookup retrieves the correct IP address and directs your computer to it within a fraction of a second. It would be really difficult to remember a random string of numbers every time you want to go to a particular website. That’s why they introduce a domain name that belongs to the IP address.

Hint: A Domain name is a website name that includes the entire name with WWW. yourname, including .com / .net / .me phases.

1.       Think

2.       Availability

3.       Domain Name Provider

4.       Hosting plan and Register   


1.       Think about a name

This is one of the most important tasks you must do. Think about it once, twice and three times before deciding on a name. This will be the brand name of you, your company and your organization. Don’t pick a domain name quickly and carelessly. Give yourself at least a week to consider the name. You should choose a domain name that is easy to remember and easy to type and helps your website get found in search engines.

A domain name can be derived from the words in any language. But it should be made up of letters written in English. Better if they are short and memorable. It is also acceptable for names that are created by combining multiple names, words, or letters. Users will be able to remember the domain name if it is between 0 and 15 characters long. However, there is no such rule.


2.       Search for the availability

Once you have decided on a domain name (website name), you will need to check to see if it’s currently available for your business. If your name is owned by another party before you, you will have to look for another name by yourself.

You can quickly verify whether a domain name is available on the internet by getting a domain name finder website or Domain name checker website from your search engine and check whether your name is available. Simply type yourdomain.com or .me or .net etc. Sometimes the domain name finder website also recommends a few domain names for you once you fill in your domain name on there.


3.       Choose a domain name provider

When you select your domain name, you should have to register it on the internet. As the next step, there are a few steps you have to follow. There are numerous hosting providers around the world. You can either pay for your domain name through a domain name provider company (hosting company) or you can use your domain name free by choosing a free hosting company. (Blogger)

Hosting companies: These are the businesses that help people register their domain names and give a space for them to launch their websites on the internet.


4.       Select the hosting plan and Register the domain

Once you have decided on a domain name provider, go to their website and search through their hosting plans to see which ones are compatible with you.

OR

You can purchase your domain name without a hosting plan. That means the domain name belongs only to you. After you have registered your domain name on that hosting plan provider company, the company gives you the option to choose a hosting plan at any time and gives you a chance to select a hosting plan after a week, a month, or even a year, you have registered your domain name.

When you decide to purchase a domain name, you can either choose to only buy the domain name or opt for the hosting plan that comes along with it. To complete the purchase, you will need to enter your credit/debit card details or pay via your PayPal account. You can choose to pay for your domain name only or the entire hosting plan with a domain name on a monthly, annual, or once every three years basis. The hosting company will send you an e-mail for confirmation after you make a transaction. Check your e-mails to confirm.

During the purchasing process, you may be asked to provide a username and password for the hosting panel. Some hosting companies generate their login credentials for their customers, and they may have delivered those credentials to the customer’s e-mail.

Hosting Panel: This is the panel that your hosting company has given you to use for your future tasks. This panel contains all of the information including all settings and the expiration date about your domain name or hosting plan related to your website/websites. 


Congratulations!

Now you have your domain name, which means you have your website. You can log in to your hosting panel at any time by entering the credentials you provided or they sent to your e-mail.   

Now you can type your full domain name (ex: www.name.com) in the address bar in any web browser. You will see a page that says ‘website is coming soon’. Sometimes it may take up to two hours to settle the website.

(If you have installed WordPress to your website from the Hosting Panel, you will appear the default WordPress theme after typing your domain in the address bar)      

How to create your own website in Wordpress ? 


 ---------------------------------------------------- The End ------------------------------------------------------- 

Just 05 Steps: How To Start Your Own Website in WordPress? Beginner Guide

How to start your own website in wordpress? 100% free guide


In this tutorial, you can learn the basic wordpress tips before you going to start a website.

How to get a Domain Name for you? Click Here


What is WordPress? A Simple Explanation

It is basically a software that is used to create and post blogs or websites to publish on the internet. It is also called a Content Management System or CMS. It was created in 2003. It has grown to be the most well-known website publishing application worldwide since its launch in 2003. It powers 30% of websites on the internet.

WordPress is an open-source software and it is free for the users.

With WordPress, you don’t need to know how to code at all. Everything is done through drag and drop. There are more than 11,000 distinct themes available, which are essentially template layouts that define the appearance and feel of your website. Also, it gives more than 50,000 plugins to help optimize the functionality of your website. All of the text may be altered including the fonts and the sizes used, buttons can be made, and even you can add images and videos and much more.

Building a WordPress website is all online. You can build websites online from anywhere, as long as you have an internet connection.

Instead of online, installing WordPress and a data server to your local computer, you can start building websites locally on your computer. But make sure to have an internet connection to download plugins and themes. In that case, you have to export the website to an online server when you finish it.


You may notice that there are two parties of wordpress, wordpress.com and wordpress.org. 

What is the difference between WordPress.com and WordPress.org?


What is WordPress.com

Even you can build your website free with their web hosting. But,

1.       A Website could be deleted at any time if WordPress feels that you have violated its terms and conditions for any reason.

2.       You can’t use ads to make money from your website. (No monetization)

3.       You can’t upload plugins that help you to optimize the functionality of your website.

4.       You can’t upload customizable themes.

5.       You do not own your domain name. It might be yourdomainname.wordpress.com.


What is WordPress.org

You can host your website in any hosting company and use wordpress.org to build it.

1.       You have access to thousands of plugins.

2.       You can monetize your website with ads.

3.       You can use your unique domain name.

4.       You have permission to completely customize your website.


Step Number 1

How do you log in to your WordPress dashboard?

You already have your domain name now, if not  CLICK HERE to know how to register a domain name/website name for you and how to get a website host.

In your web browser, type your domain name in the address bar. After typing your domain name, then type /wp-admin.

Ex: www.yourdomainname.com/wp-admin


Then you will get a login window like below.


Type the Username or Email Address that you created before when you installed WordPress into your hosting panel. 


Then type -> Password.

Then Click -> Log In

When you complete your login process, you will be able to see the WordPress Dashboard like below.


Step Number 2

How to install a theme for your website?

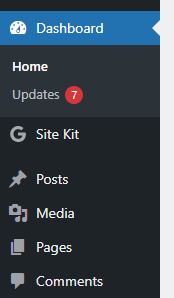
On your left menu, beginning from ‘Dashboard’ there is an item called ‘Appearance’. Move your cursor to Appearance and then Appearance’s sub menu will appear.


Then click on Themes.

You can see the default themes on your window.


You have two options,

1.       Select a default theme or

2.       You can add a new theme to your website.

When you click on the ‘Add New Theme’ button, you will see new themes compatible with your website.   


When you move your cursor into a theme, it will appear the ‘Activate’ and ‘Live Preview’ buttons.


You can see a live preview of the selected theme or simply you can activate the theme by clicking on the ‘Activate’ button.

When you have done the process properly, a Green ‘Installed’ label will appear.  


Then you can customize the theme that you activated.


Step Number 3

How you can create a Page on WordPress?

On your left menu, beginning from ‘Dashboard’ there is an item called ‘Pages’.


Move your cursor to the Pages and then Page’s sub menu will appear.


Then click on -> Add New

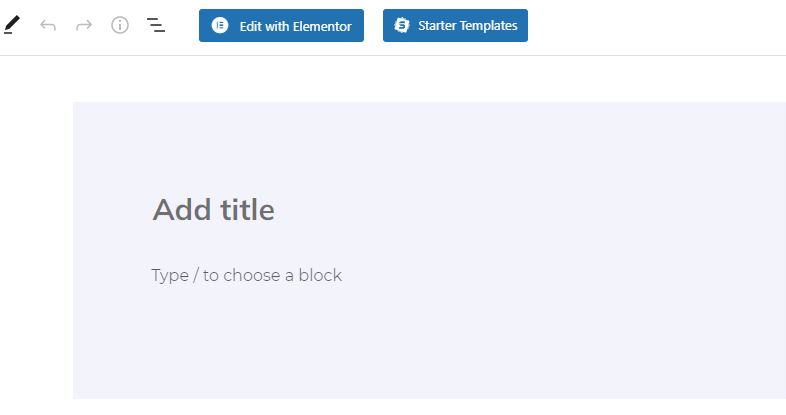
You can see the default Page builder window.


Now you can add content for the page.

Then click on -> Publish


Hint:

If you can add the Elementor Plugin to your website, all the customization processes will be easy.   

How to add the Elementor Plugin to your website? Elementor Full Guide CLICK HERE 

Simply go to the Plugins on your left menu.


Then Click -> Add New

Type -> ‘Elementor’ on the Search Plugins… Text Area On your right side.


Then Click on -> Install Now

Then Click on-> Activate


Step Number 04

How you can create a Post on WordPress?

On your left menu, beginning from Dashboard there is an item called Posts. 


Move your cursor to the Posts and then Post’s sub menu will appear.

Then click on -> Add New

You can create and publish posts similar to Pages.


Step Number 05

How to add Users/Admins to your website?

Move to the Users on the left side of your WordPress menu.


Then click -> Users

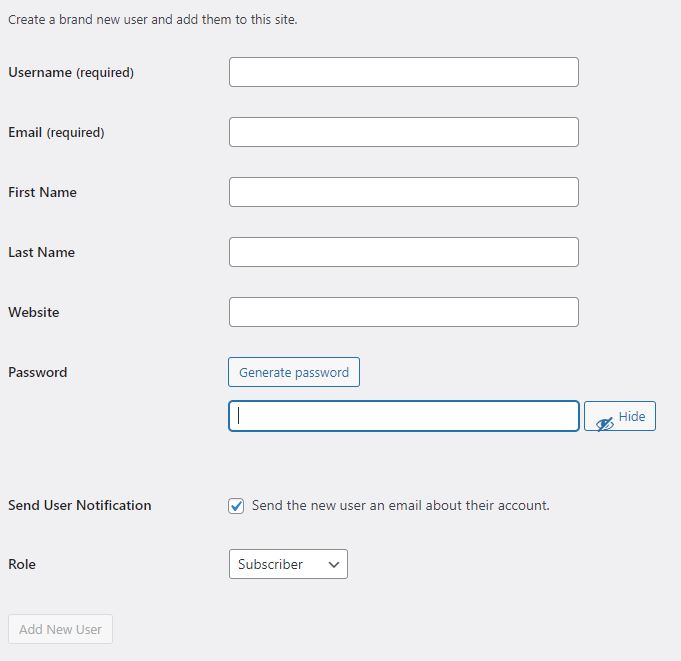
Click -> Add New


Then provide the required

1.       Username

2.       Email

3.       First Name

4.       Last Name

5.       Website (Optional)

6.       Password

7.       Select the role – Subscriber or Administrator …


Then Click -> Add New User

After Adding a User to the website, the verification e-mail will be sent to the provided e-mail address.

Then verify the process.

A new user can log in to the admin panel of the website at any time by providing the username (usually the email address) and the password provided, when you create the new user. 

As same as Step Number 1.


------------------------------------------------------ The End -------------------------------------------------------


Contact Us

Name

Email *

Message *