Showing posts with label Wordpress. Show all posts

Thursday

How To Get AdSense Approval for a Blogger Website?

These tips will guide you to get AdSense on your website.


Sections of this article;

·         What is a blog?

·         What are the best niches?

·         What is a tool website?

·         How to Connect Google to your website?

·         List of requirements to activate an AdSense account for a blog website

·         Requirements to activate an AdSense account for a tool website


What is a blog?

The simple meaning of blogging is content creation.


How you can start it?

Step 01

You need to choose a topic that interests you, such as travel, education, vehicle reviews, cooking, or any other that you love.

Step 02

Once you select a title, you have the option to break it down into sub-titles. For example, if you choose "Traveling" as your main title, you can further categorize it by adding the most popular travel destinations, or by highlighting the most significant religious or historical places.

Step 03

Find details related to your subtitles.

Step 04

You can write your own articles, one by one, using correct spelling and grammar.

Step 05

Put your articles into the blog.

For instance, you can check out this blog site to see how they have approached it: www.hikkasl.blogspot.com


What are the Best niches for AdSense?

Niche – If someone writes articles about the targeted phase of things, it is called a niche. Further, if someone’s website describes or consists of a particular content with several articles, it is called a niche website. Apart from those booking or company websites included.


These are the best niches for you;

             Traveling

             Technical / Machinery

             IT field

             Educational

             Cooking

             Vehicle details


What is a tool website?

Tool websites are those that offer various tools for tasks like photo and video editing, file conversion, downloaders, calculators, etc. Sometimes the technical niches have their own technical converters or downloaders within the same niche.


What are the requirements to get Google AdSense for a niche websites?

You can have an approved AdSense account by doing these things to your niche website;

1) Pure content (no copied content) – It is important to create original content for your website that is free from any copyright infringement.

2) Well-organized content - When writing articles, it's important to ensure that the content, titles and subtitles are well-organized.

3) Attractive website - Your website should be an attractive one. You have the freedom to choose any theme or design a custom website.

4) 20,000 - 25,000 words (15 to 20 articles) – Include at least 15 articles on the website.

5) Contact us – Must include a contact us page or contact section on the website.

6) About us - Must include about us page.

7) Privacy Policy – Include a privacy policy page.

8) Terms and Conditions – Include terms and conditions page.

9) No errors in the website – Your website must be an error-less website. Ex: loading errors, language and grammar issues.

10) Make sure to index all the pages from the Google search console & connect Google Analytics to your website (optional)

11) You need to copy the code snippet that is generated in the ‘Ad Unit’ section in the AdSense account and paste it between the <head> tags in the header.php file of your website. (They clearly mention where you want to put it when you going to copy the code)

Don’t consider website traffic. First, get the approval from AdSense and then make traffic.


What are the requirements to get Google AdSense approved for a tool website?

You are creating a website that includes a mechanism such as a calculator, converter, or link generator, or a buying and selling website, even a one-page or landing page website will suffice.


These are the basic requirements that you need to know when creating a website.

1.       Font Size; Article subheadings;

Font - same as article headline (uppercase or lowercase) or paragraph font

Size –same as article headline (uppercase or lowercase) or larger than paragraph font but lesser than article headline

       2.       Use the same font style and font size for all paragraphs.

       3.       Privacy Policy & Disclaimer pages, subheadings of these pages should be as 01.

       4.       Do not put privacy policy disclaimer or terms and conditions pages in the menu bar.

       5.       The characters of the paragraph should be of the same size.

       6.       Use a maximum of 02 font sizes for an article.

       7.       Use a maximum of 02 font styles for an article.

       8.       Use one font style for the headlines of all posts (Ex: uppercase or lowercase).

       9.       Subheadings under subheadings; should be the same font size.

      10.   If subheadings are in bold, subheadings of subheadings should be normal.

      11.   No copyright issues for post images.

      12.   All headings should be the same style.

      13.   Add one sitemap which includes all posts and pages.

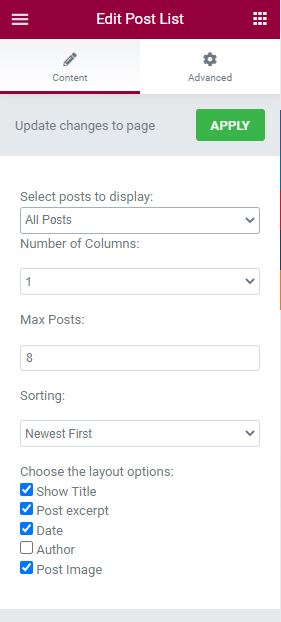
Tip: include all posts to a page and name it as ‘All Posts’ & display it in the footer or menu bar.


      14.   Try to maintain a minimum of 05 lines in a paragraph.

      15.   Try to use the official email for the website.

Tip: Add the list of subheadings of the article at the beginning and make jump-links.


How to connect Google to your website?

To improve your website's performance, you need to connect it to the Google Search Console. First, create an account using your email and open Search Console in your browser. Once you're in, you'll find a unique code snippet assigned to you. Make sure to copy that code and paste it between the <head> tags in the header.php file of your website. The same process applies to connecting Google Analytics.

To confirm that a website is owned by you, it is necessary to verify it in Google Search Console. There are various methods to do so. Once the ownership is confirmed, a green label will be displayed to indicate that the property belongs to you. It is important to ensure that this process is completed to avoid any confusion or issues in the future.

There are two options available in the Search Console to index your website. You have an option to index it automatically or you can do it manually by yourself. They take some time to index it automatically. I recommend you index your website manually by pasting all the links one by one to the search console.  

The other important fact is you have to generate a sitemap for your website. Submit the link of your site map to the Search Console. They reveal the results, whether the corrections you have to do, within two weeks from the date you submitted.

Go to AdSense and make sure to create an account related to the email you provided to the Search Console. Put the main AdSense code in between <head> tags in the header.php file of your website. Make sure to turn on Auto-Ads from AdSense (Optional).


---------------------------------------------------- The End --------------------------------------------------------


Tuesday

Just 05 Steps: How To Start Your Own Website in WordPress? Beginner Guide

How to start your own website in wordpress? 100% free guide


In this tutorial, you can learn the basic wordpress tips before you going to start a website.

How to get a Domain Name for you? Click Here


What is WordPress? A Simple Explanation

It is basically a software that is used to create and post blogs or websites to publish on the internet. It is also called a Content Management System or CMS. It was created in 2003. It has grown to be the most well-known website publishing application worldwide since its launch in 2003. It powers 30% of websites on the internet.

WordPress is an open-source software and it is free for the users.

With WordPress, you don’t need to know how to code at all. Everything is done through drag and drop. There are more than 11,000 distinct themes available, which are essentially template layouts that define the appearance and feel of your website. Also, it gives more than 50,000 plugins to help optimize the functionality of your website. All of the text may be altered including the fonts and the sizes used, buttons can be made, and even you can add images and videos and much more.

Building a WordPress website is all online. You can build websites online from anywhere, as long as you have an internet connection.

Instead of online, installing WordPress and a data server to your local computer, you can start building websites locally on your computer. But make sure to have an internet connection to download plugins and themes. In that case, you have to export the website to an online server when you finish it.


You may notice that there are two parties of wordpress, wordpress.com and wordpress.org. 

What is the difference between WordPress.com and WordPress.org?


What is WordPress.com

Even you can build your website free with their web hosting. But,

1.       A Website could be deleted at any time if WordPress feels that you have violated its terms and conditions for any reason.

2.       You can’t use ads to make money from your website. (No monetization)

3.       You can’t upload plugins that help you to optimize the functionality of your website.

4.       You can’t upload customizable themes.

5.       You do not own your domain name. It might be yourdomainname.wordpress.com.


What is WordPress.org

You can host your website in any hosting company and use wordpress.org to build it.

1.       You have access to thousands of plugins.

2.       You can monetize your website with ads.

3.       You can use your unique domain name.

4.       You have permission to completely customize your website.


Step Number 1

How do you log in to your WordPress dashboard?

You already have your domain name now, if not  CLICK HERE to know how to register a domain name/website name for you and how to get a website host.

In your web browser, type your domain name in the address bar. After typing your domain name, then type /wp-admin.

Ex: www.yourdomainname.com/wp-admin


Then you will get a login window like below.


Type the Username or Email Address that you created before when you installed WordPress into your hosting panel. 


Then type -> Password.

Then Click -> Log In

When you complete your login process, you will be able to see the WordPress Dashboard like below.


Step Number 2

How to install a theme for your website?

On your left menu, beginning from ‘Dashboard’ there is an item called ‘Appearance’. Move your cursor to Appearance and then Appearance’s sub menu will appear.


Then click on Themes.

You can see the default themes on your window.


You have two options,

1.       Select a default theme or

2.       You can add a new theme to your website.

When you click on the ‘Add New Theme’ button, you will see new themes compatible with your website.   


When you move your cursor into a theme, it will appear the ‘Activate’ and ‘Live Preview’ buttons.


You can see a live preview of the selected theme or simply you can activate the theme by clicking on the ‘Activate’ button.

When you have done the process properly, a Green ‘Installed’ label will appear.  


Then you can customize the theme that you activated.


Step Number 3

How you can create a Page on WordPress?

On your left menu, beginning from ‘Dashboard’ there is an item called ‘Pages’.


Move your cursor to the Pages and then Page’s sub menu will appear.


Then click on -> Add New

You can see the default Page builder window.


Now you can add content for the page.

Then click on -> Publish


Hint:

If you can add the Elementor Plugin to your website, all the customization processes will be easy.   

How to add the Elementor Plugin to your website? Elementor Full Guide CLICK HERE 

Simply go to the Plugins on your left menu.


Then Click -> Add New

Type -> ‘Elementor’ on the Search Plugins… Text Area On your right side.


Then Click on -> Install Now

Then Click on-> Activate


Step Number 04

How you can create a Post on WordPress?

On your left menu, beginning from Dashboard there is an item called Posts. 


Move your cursor to the Posts and then Post’s sub menu will appear.

Then click on -> Add New

You can create and publish posts similar to Pages.


Step Number 05

How to add Users/Admins to your website?

Move to the Users on the left side of your WordPress menu.


Then click -> Users

Click -> Add New


Then provide the required

1.       Username

2.       Email

3.       First Name

4.       Last Name

5.       Website (Optional)

6.       Password

7.       Select the role – Subscriber or Administrator …


Then Click -> Add New User

After Adding a User to the website, the verification e-mail will be sent to the provided e-mail address.

Then verify the process.

A new user can log in to the admin panel of the website at any time by providing the username (usually the email address) and the password provided, when you create the new user. 

As same as Step Number 1.


------------------------------------------------------ The End -------------------------------------------------------


Monday

Wordpress Elementor Beginner Guide | How to make Jumplinks in WordPress | Elementor

How to use Elementor in Wordpress? Elementor beginner guide


In this tutorial, we are going to show you how to make customizations using the free Elementor plugin in Wordpress. Elementor is a freemium plugin that you can use to make easy and usable customizations to the pages or posts on your website. 

Hint: Freemium plugins have two versions for the users.

1.       It is a free plugin, anyone can activate it without paying.

2.       But it has a Premium version too, which includes more options than the free version. Users have to pay for the activation.


How to activate the free Elementor plugin on dashboard?

1.       Login to your dashboard

2.       Then Go to the -> Plugins on your left side menu 


3.       Click on -> Add New

Then you will be able to see the plugins menu on your dashboard.

4.       Type-> Elementor on your right side search area 


5.       Press-> Enter 

6.       Then Click on-> Install Now 


7.       Then Click -> Activate


How to use Elementor when creating a post or page in WordPress?

1.       Click on-> Posts

2.       Then-> Add New 


The post editor page will appear

3.       Then Click on-> Edit with Elementor 


You can see the Elementor post editor on your left side. Simply Drag and Drop the items to the post or page that you are creating.


What are the options available in the free Elementor plugin?

1.       Basic Elements 


2.       General Elements 


3.       Header and Footer builder Elements 


4.       Wordpress Elements 


Below will discuss the essential elements that you value when you are creating your website. 

Basic Elements

Inner Section – By adding this Element, your post or page can be divided into two separate sections. Further, each element can be filled from elements.


Heading – You can add Headings to your page or post.

Image – Add Images to your content.

Text Editor – Add paragraphs

Video - Add Videos

Button – Add buttons as you want. You can customize the button size, color or button position too.

Drag and Drop the button into the page or post. Then on your left hand side menu

Click Content -> Customize the button text and Button link etc. 


Click Style -> Change the button color, background and hover. 


Click Advanced – Customize the button position indeed. 


Divider – You can divide two sections in a page or post.

Spacer – Make spaces between two sections.

Google Maps – You can add the Google Map Location that you chose to your page or post.

Icon – You can add any icon from the icon library.

WPForms – This contains the contact forms that will create the connections between the website and the users. 


General Elements

HTML – Simply drag and drop the element and then you can add any html code segment to your page or post.


Social Icons – You can add any social media link that engaged with your website.


Wordpress Elements

Pages - You can get the set of all pages that containing in your website into a single page.      

Single Post – You can show the title, post excerpt, date, author and post image of a selected post.


Post List – You can create a list of your all posts with post title, post excerpt, date, author and post image in a single page. 


Our primary purpose for the users after reading this article, get a better knowledge and handling of the basic essential elements of the Elementor in WordPress.


 -------------------------------------------------------------------------------------------------------------------


How to make jump links on another page or post in WordPress?


Meaning:- Jump links / Anchor Links: When you click the link, you can jump into the sections within the page.

How to link sections on the same page in WordPress?

First, you have to name the sections.

1.       Go and Select the specific section that you want to jump when clicking on your page:

(Ex: Paragraph, Heading, Inner Section, Image, Video, etc.)

2.       Then go to -> Edit Section on the left of your screen.

3.       Select -> Advanced settings.

4.       Expand -> Advanced

5.       Then give a unique name to the CSS ID index.

(Ex: computernetwork)


Then go to the section where you want to make the link.

6.       Select a specific name or heading or whatever you want to make the link.

7.       Then go to the -> Edit Section on the left of your screen.

8.       Go to the -> Content

9.       Expand -> Text Editor

10.   Highlight the word phase, word or anything that you want to make as a link. 


11.   Then click the Link button. 


12.   Then give the CSS ID, you gave when you named the section.

13.   Make sure to add the # symbol before you add CSS ID. (Ex: #computernetwork)

14.   Then Click -> Apply 


Hint: If you want to make changes to the inserted link, go to -> Settings button (next to the Apply button), update your changes and click update. 


How to link sections on another page or post in WordPress?

First, you have to name the sections.

1.       Go and Select a specific section on your page:

(Ex: Paragraph, Heading, Inner Section, Image, Video, etc.)

2.       Then go to -> Edit Section on the left of your screen.

3.       Select -> Advanced settings.

4.       Expand -> Advanced

5.       Then give a unique name to the CSS ID index.

(Ex: computernetwork


Then go to the section where you want to make the link.

6.       Select a specific name or heading or whatever you want to make the link.

7.       Then go to the -> Edit Section on the left of your screen.

8.       Go to the -> Content

9.       Expand -> Text Editor

10.   Highlight the word phase, word or anything that you want to make as a link. 


11.   Then click the Link button. 


12.   Give the Page Link or Post Link where you named your section.

13.   Then give the section name. (Picture)

14.   Make sure to separate Page Link or Post Link, and your section name by ( / ) symbol. 


15.   Then Click -> Apply


------------------------------------------------------- The End -------------------------------------------------------


Contact Us

Name

Email *

Message *