How to use Elementor in Wordpress? Elementor beginner guide
In this
tutorial, we are going to show you how to make customizations using the free Elementor
plugin in Wordpress. Elementor is a freemium plugin that you can use to make
easy and usable customizations to the pages or posts on your website.
Hint: Freemium plugins have two versions for the users.
1. It is a free plugin, anyone can activate it without paying.
2. But it has a Premium version too, which includes more options than the free version. Users have to pay for the activation.
How to activate the free Elementor plugin on dashboard?
1. Login to your dashboard
2. Then Go to the -> Plugins on your left side menu
3. Click on -> Add New
Then you will be able to see the plugins menu on your dashboard.
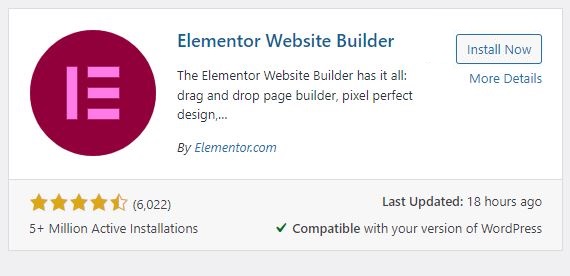
4. Type-> Elementor on your right side search area
5. Press-> Enter
6. Then Click on-> Install Now
7. Then Click -> Activate
How to use Elementor when creating a post or page in WordPress?
1. Click on-> Posts
2. Then-> Add New
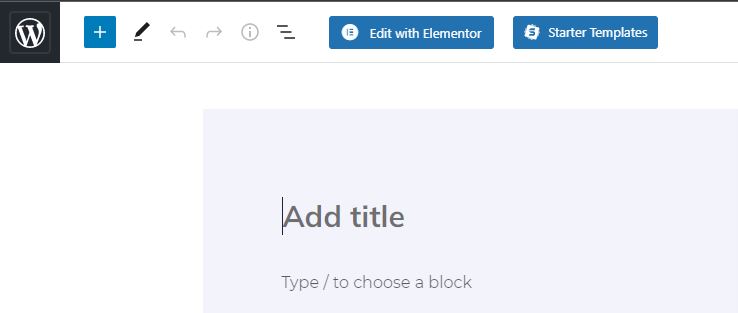
The post editor page will appear
3. Then Click on-> Edit with Elementor
You can see
the Elementor post editor on your left side. Simply Drag and Drop the
items to the post or page that you are creating.
What are the options available in the free Elementor plugin?
1. Basic Elements
2. General Elements
3. Header and Footer builder Elements
4. Wordpress Elements
Below will
discuss the essential elements that you value when you are creating your
website.
Basic
Elements
Inner
Section – By adding this Element, your post or page can be divided into two
separate sections. Further, each element can be filled from elements.
Heading –
You can add Headings to your page or post.
Image – Add
Images to your content.
Text Editor
– Add paragraphs
Video - Add
Videos
Button –
Add buttons as you want. You can customize the button size, color or button
position too.
Drag and
Drop the button into the page or post. Then on your left hand side menu
Click Content -> Customize the button text and Button link etc.
Click Style -> Change the button color, background and hover.
Click Advanced – Customize the button position indeed.
Divider –
You can divide two sections in a page or post.
Spacer –
Make spaces between two sections.
Google Maps
– You can add the Google Map Location that you chose to your page or post.
Icon – You
can add any icon from the icon library.
WPForms – This contains the contact forms that will create the connections between the website and the users.
General
Elements
HTML – Simply drag and drop the element and then you can add any html code segment to your page or post.
Social
Icons – You can add any social media link that engaged with your website.
Wordpress
Elements
Pages - You
can get the set of all pages that containing in your website into a single
page.
Single Post
– You can show the title, post excerpt, date, author and post image of a
selected post.
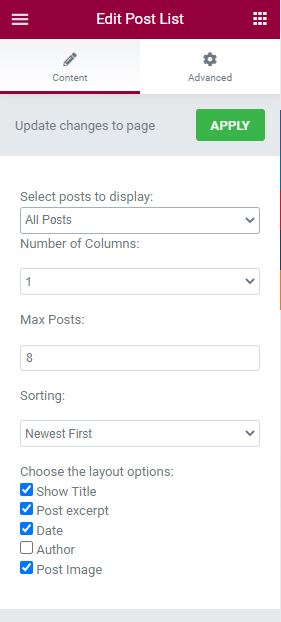
Post List – You can create a list of your all posts with post title, post excerpt, date, author and post image in a single page.
Our primary
purpose for the users after reading this article, get a better knowledge
and handling of the basic essential elements of the Elementor in WordPress.
How to make jump links on another page or post in WordPress?
Meaning:- Jump links / Anchor Links: When you click the link, you can jump into the sections within the page.
How to link sections on the same page in WordPress?
First, you have to name the sections.
1. Go and Select the specific section that you want to jump when clicking on your page:
(Ex: Paragraph, Heading, Inner Section, Image, Video, etc.)
2. Then go to -> Edit Section on the left of your screen.
3. Select -> Advanced settings.
4. Expand -> Advanced
5. Then give a unique name to the CSS ID index.
(Ex: computernetwork)
Then go to the section where you want to make the link.
6. Select a specific name or heading or whatever you want to make the link.
7. Then go to the -> Edit Section on the left of your screen.
8. Go to the -> Content
9. Expand -> Text Editor
10. Highlight the word phase, word or anything that you want to make as a link.
11. Then click the Link button.
12. Then give the CSS ID, you gave when you named the section.
13. Make sure to add the # symbol before you add CSS ID. (Ex: #computernetwork)
14. Then Click -> Apply
Hint: If you want to make changes to the inserted link, go to -> Settings button (next to the Apply button), update your changes and click update.
How to link sections on another page or post in WordPress?
First, you have to name the sections.
1. Go and Select a specific section on your page:
(Ex: Paragraph, Heading, Inner Section, Image, Video, etc.)
2. Then go to -> Edit Section on the left of your screen.
3. Select -> Advanced settings.
4. Expand -> Advanced
5. Then give a unique name to the CSS ID index.
(Ex: computernetwork)
Then go to the section where you want to make the link.
6. Select a specific name or heading or whatever you want to make the link.
7. Then go to the -> Edit Section on the left of your screen.
8. Go to the -> Content
9. Expand -> Text Editor
10. Highlight the word phase, word or anything that you want to make as a link.
11. Then click the Link button.
12. Give the Page Link or Post Link where you named your section.
13. Then give the section name. (Picture)
14. Make sure to separate Page Link or Post Link, and your section name by ( / ) symbol.
15. Then Click -> Apply
------------------------------------------------------- The End -------------------------------------------------------


.jpg)


No comments:
Post a Comment